Picture Framing - the basics. Part 3
Posted on
Picture Framing - by Anne Kerr
Part 3: Making your own picture frame
In Parts 1 and 2 we looked at picture framing tools and the process of cutting mounts and glass in order to 'do up' old frames, or to adapt purchased ones to our specifications. We will now look at making our own bespoke frames. In order to make your own frames you now need the two additional tools mentioned in Part 1. These are: a tool for cutting your picture moulding (mitre guillotine or mitre saw) and a tool for pinning the frame corners (an underpinner).
A picture frame may seem a very simple thing; four pieces of moulding fixed at the four corners. However, frames come in an infinite variety of materials, shapes and sizes. Some picture frame mouldings have very detailed contours and should be avoided by the beginner. Stick to simple moulding shapes with uncomplicated decorations. Figure 1 shows you cross sections of a simple moulding and a complex moulding. The more lumps and bumps there are the more bits you have to match up exactly at the mitred corners.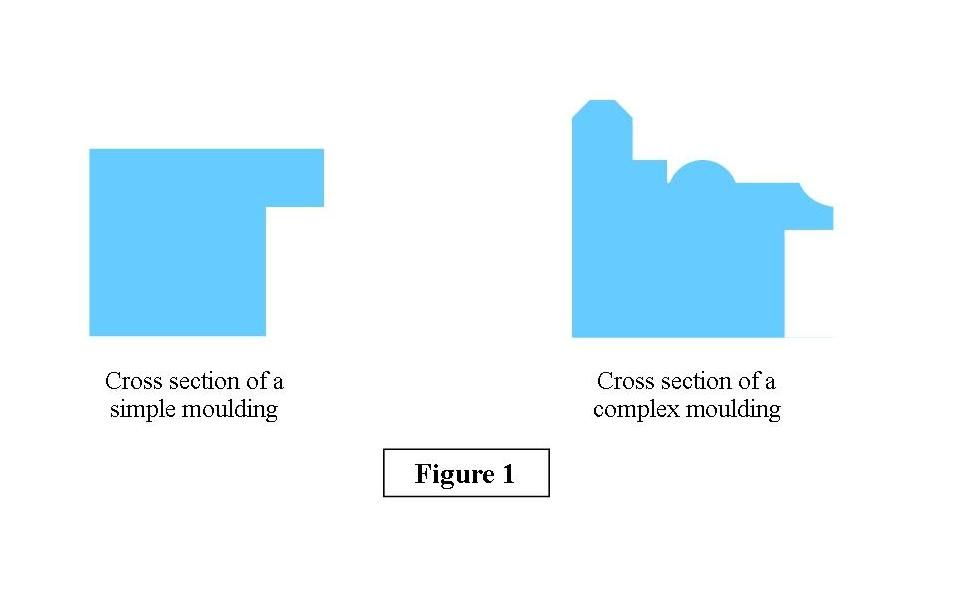
If you go into any framing shop on the High Street, you will be confronted by hundreds of different moulding samples. Where do you start?. For your first framing project, choose a moulding that is fairly simple and of medium width, approximately 25 - 35mm. A' flat' or 'cushion' shaped moulding would be an excellent choice (figure2).
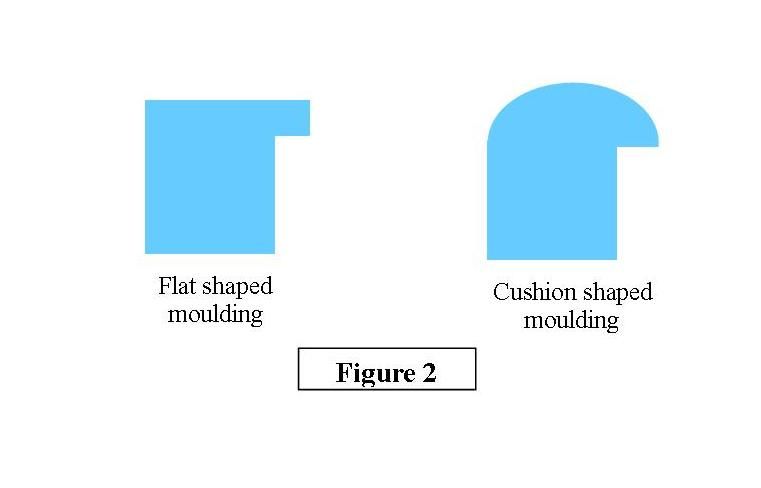
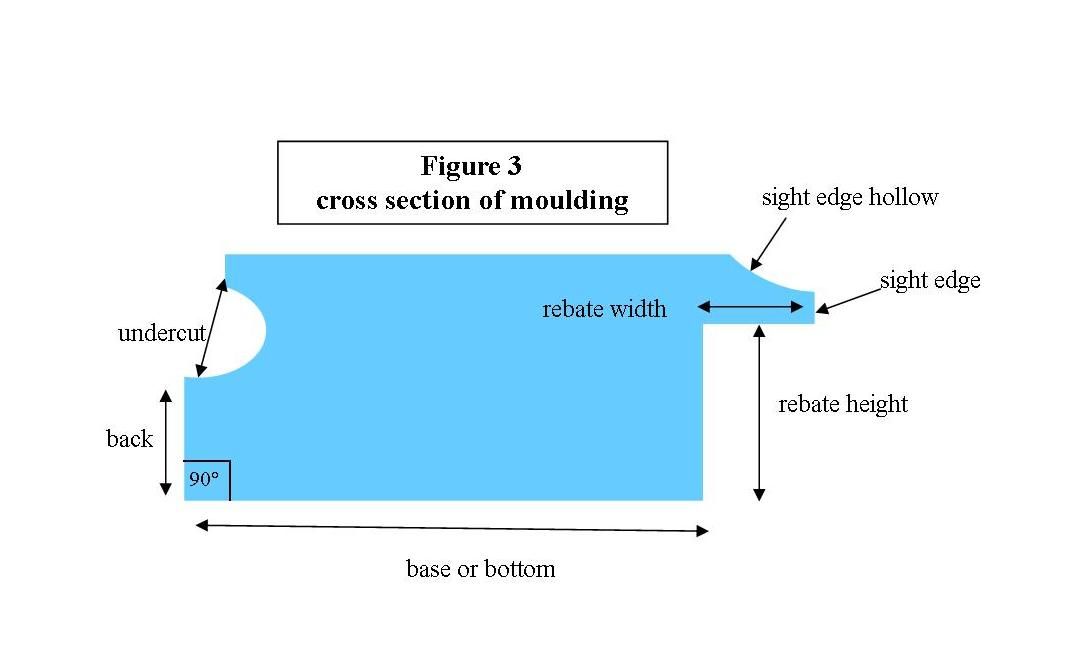
Do not choose something as complicated as the one shown in figure 1. You could choose either a bare wood moulding or a machine finished one. The range of machine finished mouldings is endless. Some are painted, lacquered, covered in foil, embossed and many other styles and finishes. However, a word of warning if you choose a bare wood moulding. Do not choose Ash. This is a beautiful wood with wonderful graining but it is incredibly hard to cut even on a professional mitre cutter. Figure 3 shows you a cross section of a piece of moulding labelled with some of the terms we use in picture framing. It would be useful to get to know some of these terms.
 In order to make a mitred frame, you need to make careful note of the size of the project before buying and cutting the picture moulding.
The dimensions of the mounted artwork obviously takes into account the width and height of the piece but must also take into consideration its overall depth. The overall depth is made up of a single or double mount, undermount, backboard, glass and the artwork itself. This depth dimension has a direct bearing on the required 'rebate' height in the chosen moulding (refer to figure 3). The rebate width (figure 3) has a bearing on how accurately you need to cut various elements such as the glass. The smaller the rebate width the less room for error.
Now, if we have carefully chosen an appropriate shape and size for our moulding and considered the rebate width and height required, we can limit our choice of mouldings considerably.
Planning the quantity of moulding required
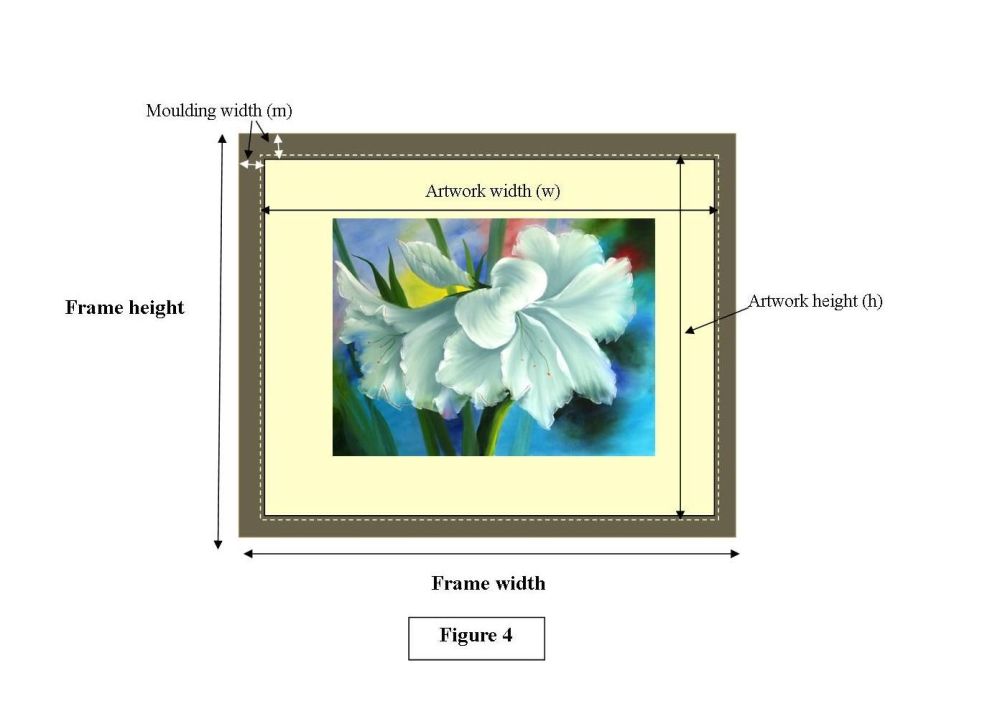
Measure the width and height of your mounted artwork. (figure 4)
You will need:
1. Two pieces of moulding the width of the mounted artwork + 2 x the width of the moulding (In figure 4 this is w+m+m)
2. Two pieces of moulding the height of the mounted artwork + 2 x the width of the moulding (in figure 4 this is h+m+m)
How do you work out how much moulding to buy? Here is an example using figure 4 as reference.
|
Artwork width (w) = |
450mm |
|
Moulding width (m) = 50mm( x 2) |
100mm |
|
1 frame width = |
550mm |
|
|
|
|
Artwork height (h) = |
378mm |
|
Moulding width (m) = 50mm ( x2 ) |
100mm |
|
I frame height = |
478mm |
|
Therefore order required will be: 2 x frame width @ 550mm = 1100mm (1.1m) 2 x frame height @ 478mm = 956 mm (95.6cm) Allowing 10% extra for cutting, you will need approximately 2.2 metres of your chosen moulding |
|
Most picture frame moulding is sold in lengths of approximately 3 metres. You can purchase individual lengths or by the boxful for bigger projects.
You will always have some wastage when cutting your moulding lengths. Keep the odd bits and when you have enough, make up little frames to use for family photographs or small pieces of artwork at some future date.
Cutting the picture moulding
You will be cutting two pieces the width of your mounted artwork ('w' in figure 4), and two pieces the height of your mounted artwork ('h' in figure 4).
It's a good idea to add a couple of mm. to the final width and height measurements. This would give you a finished frame that has a slight clearance for all the materials to fit into. If everything we fit into the finished frame is too tight, then some of the materials could buckle and the glass may crack as atmospheric conditions change.
When cutting moulding, get into the habit of cutting the longer length first. Then, if you make a mistake, this long piece can be cut down to make one of the shorter pieces.
Following the manufacturer's instructions for your own machine or cutting tool, cut your four strips of moulding with mitred corners (figure 5.)
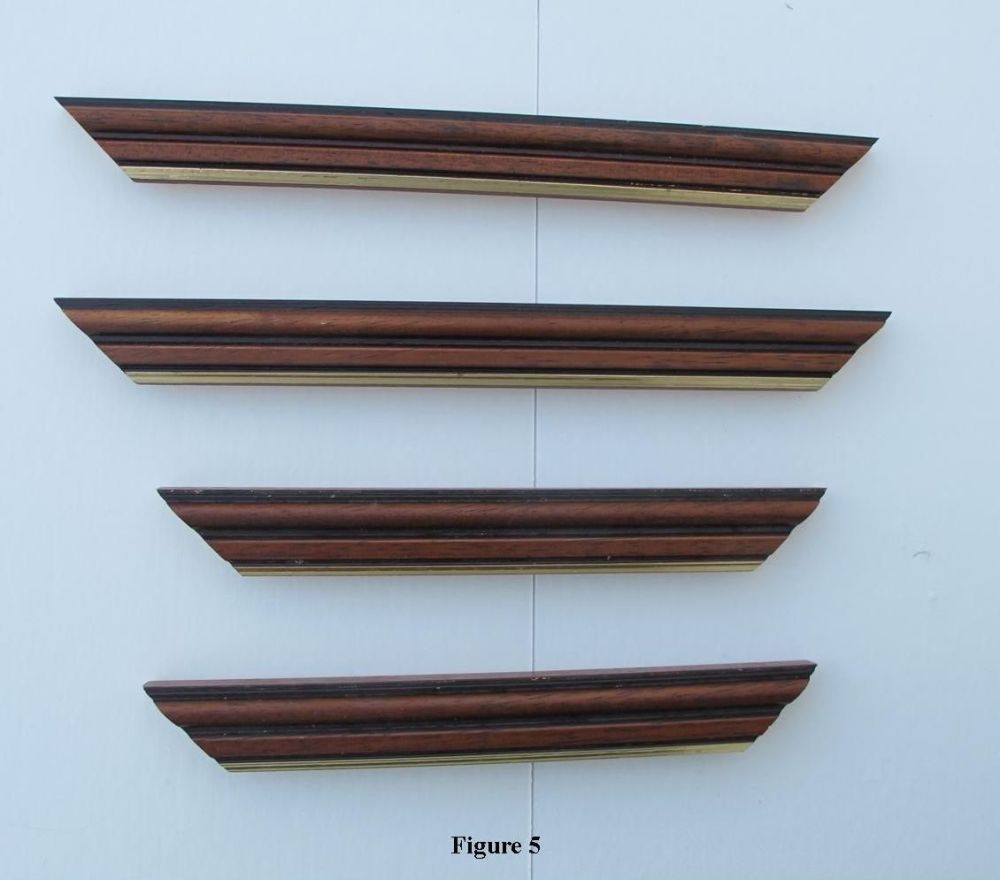
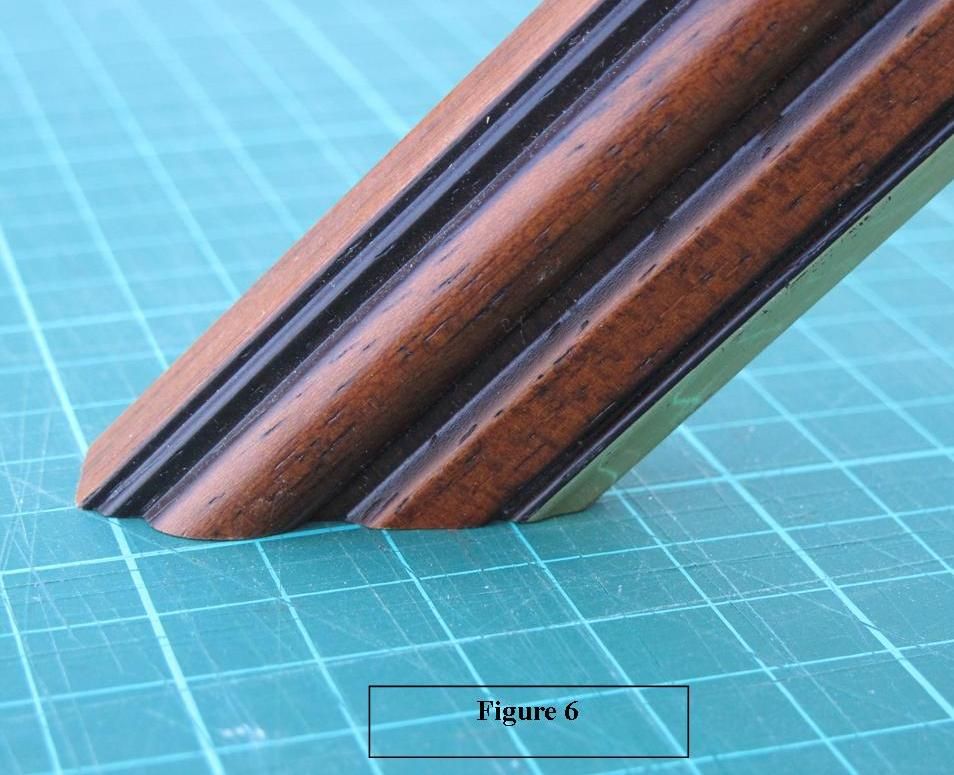
It may seem obvious advice but get into the habit of checking the first cut length of moulding against the subject to be framed. You will avoid wasting a considerable amount of moulding if you satisfy yourself at this stage that no last minute adjustments need to be made. If you have used a mitre guillotine, your mitred ends will be perfectly smooth. If you have used a hand or circular saw you could have tiny wisps of wood on the edges of the cuts. Place each mitred end flat on your cutting mat and trim off any little stray bits of wood using a craft knife (see figure 6)
Now move over to your assembly bench (probably the kitchen table!) to put your frame together. Lay matching lengths of your frame together and run your fingers down the cut ends to check that they are both exactly the same length. This is never a problem if you have used a mitre guillotine but there is more margin for error if you have used hand tools. Correct any errors before moving on. If you have cut a dark coloured moulding, run a felt-tip pen around the edges of the bare cuts where the two mitred ends will eventually meet (figure 7)
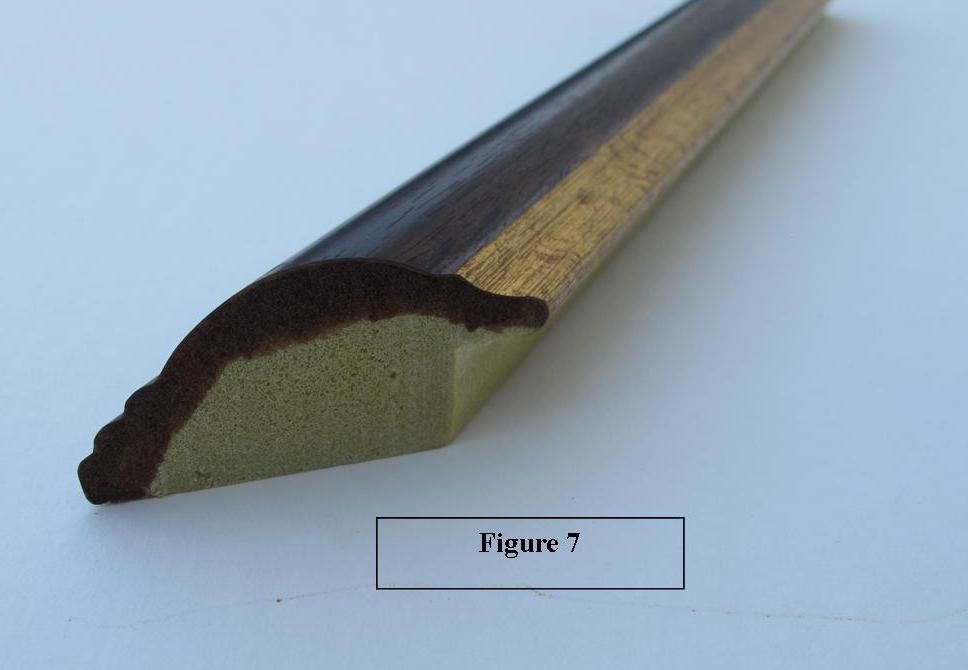
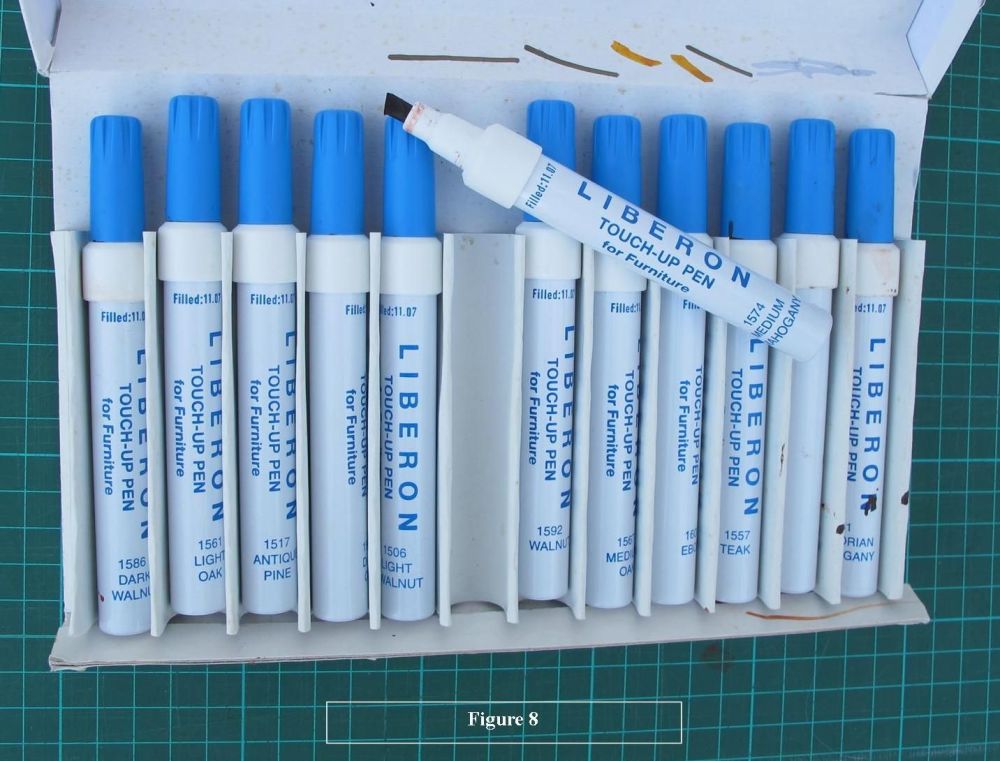
This will ensure that when you join the corners up, there will be no little telltale light coloured line down the middle. You can buy felt-tip pens the colours of various woods. These are called 'Touch-up pens' and are made by Liberon (figure 8)
It's always advisable to both glue and pin the corners of your frame for added strength. Get into the habit of holding the longer length of moulding on the left and the short one on the right. Pick up the longer length and put a small amount of good quality wood glue on the cut end. Take your long and short lengths over to your underpinner. Following your particular machine's instructions, insert the v-wedges into the mitred corner. Now is the time you will be grateful you chose an uncomplicated shape of moulding! Complicated ones are tricky to line up exactly. Aim to have one v-wedge towards the back edge and one v-wedge towards the leading edge of your corner (figure 9 ).
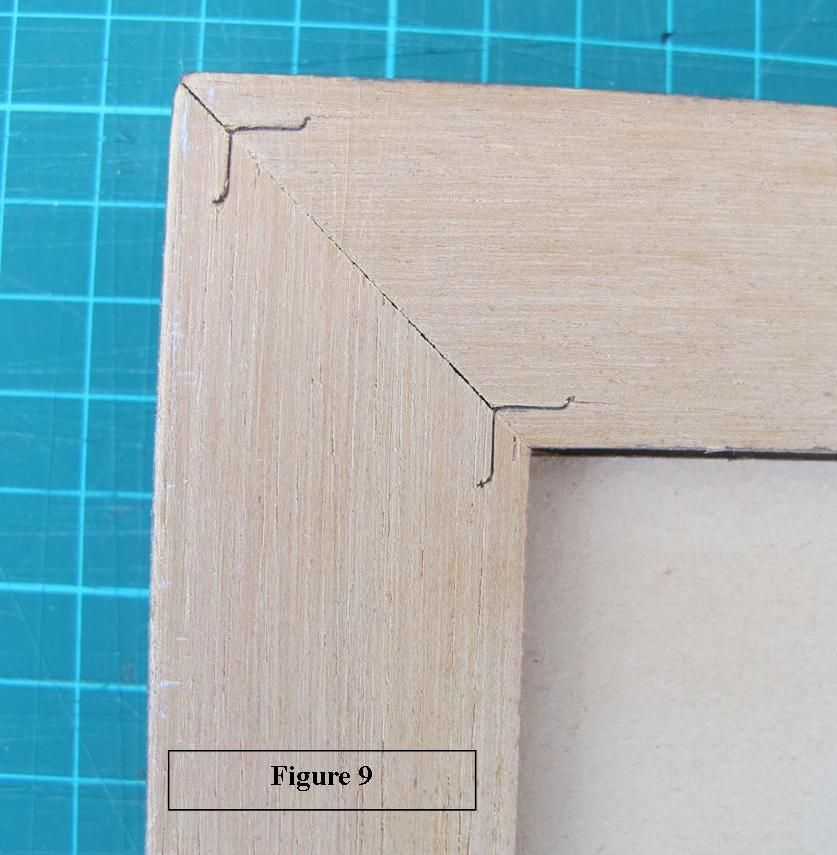
You can fill extra wedges in-between to ensure a secure job. Three wedges are sufficient for all but the very widest mouldings. Any glue that seeps out of the corner joint should be wiped off immediately. Join the other two pieces of moulding together in exactly the same way remembering to hold the long piece on the left and the short piece on the right. This way, you will not become one of us who, at sometime, have joined the two long pieces together and the two short pieces together, then wondered why we have such a peculiar shaped picture frame! Now take the two L-shapes you have made and join these together working on one corner at a time.
Congratulations! you have just completed your first bespoke picture frame.
Check your finished frame for any blemishes or scratches. Use your framer's Touch-up pens if you have them.
|
Good quality frames will:
|
|
Have crisp corners at 90 °
|
|
Lie flat on either front or back
|
|
Show no significant gaps or joints.
|
